
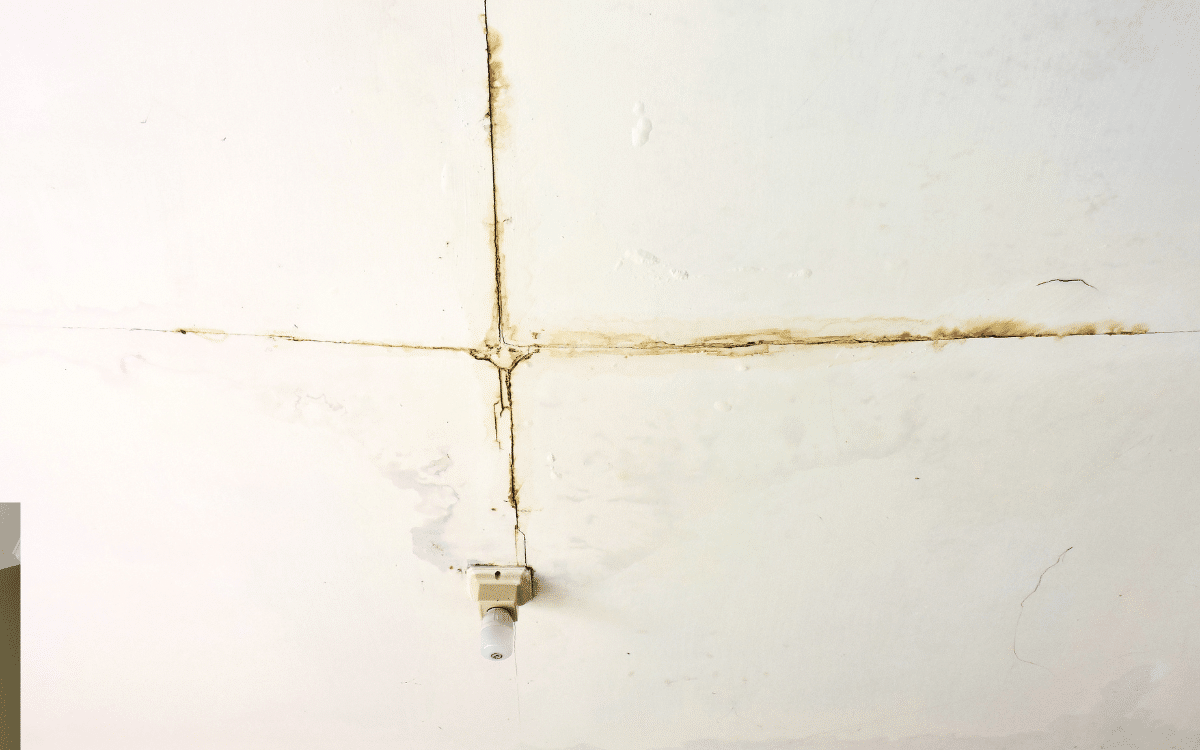
You’re sitting on your couch, enjoying your evening, when you glance up and spot an ugly water stain creeping across your ceiling. Annoying, right?
Maybe it’s a slow plumbing leak, a hidden roof issue, or just excess humidity taking its toll. Either way, leaving it alone isn’t an option. Water stains aren’t just ugly; they can lead to mold, drywall damage, and costly repairs.
If you need to remove ceiling water stains in Henderson, NV, there’s a right way to do it—and it starts with finding the root cause. Once that’s handled, it’s time to clean, prime, and repaint your ceiling for a flawless finish. We’ll walk you through the entire process so you can get your ceiling looking brand new again.
Key Takeaways:
- Ceiling stains often indicate leaks from plumbing, roofing issues, or poor ventilation.
- Fixing the source of moisture first is necessary before cleaning and repainting.
- Effective stain removal methods include vinegar, bleach, hydrogen peroxide, and commercial ceiling stain removers.
- A high-quality stain-blocking primer and moisture-resistant paint prevent stains from coming back.
What Causes Ceiling Water Stains?
Before you even think about painting over the stain, you need to figure out what’s causing it. Ignoring the root issue means the stain will just keep coming back—probably worse than before. Here are the usual suspects:
- Plumbing Leaks
If the stain is directly below a bathroom, kitchen, or laundry room, there’s a good chance a leaking pipe is responsible. Even a small drip can soak into the drywall, leaving a brownish stain and encouraging mold growth.
- Roof Leaks & Drainage Problems
If the stain is near the center of a room or along an exterior wall, a roof leak could be the culprit. Damaged shingles, cracked flashing, and clogged gutters can all let water seep inside, causing ceiling stains and potential structural damage.
- Poor Ventilation & Condensation
Steamy showers, cooking, and poor attic ventilation can cause condensation to build up over time. When that moisture has nowhere to go, it collects on ceilings, leading to water stains, mildew, and even mold. Proper ventilation and humidity control are key to stopping this cycle.
- Clogged or Overflowing Gutters
Blocked gutters force water to back up and seep into your home’s structure, affecting ceilings, walls, and even flooring. Regular gutter cleaning helps prevent this issue from turning into a bigger problem.
Fix the Root Problem Before Cleaning & Painting
Slapping a coat of paint over a water stain might seem like an easy fix, but if the underlying issue isn’t handled, you’ll be right back where you started. Addressing the cause is the only way to ensure a long-term solution. Here’s how to do it:
1. Inspect Your Roof
A roof leak can be a silent contributor to water stains. Check for missing or damaged shingles, cracked flashing, and signs of water pooling on your roof. Water damage from a compromised roof often appears as a straight line water stain on ceilings. Clogged gutters can also cause water to back up and seep into your ceiling. If you’re unsure about your roof’s condition, bringing in a professional for an inspection can save you from bigger issues down the road.
2. Check for Plumbing Leaks
A slow leak from plumbing fixtures can go unnoticed for weeks, slowly damaging drywall. Inspect all exposed pipes, fittings, and ceilings under bathrooms for damp spots, discoloration, or musty odors. Even small drips can create ceiling water stains over time, so addressing leaks promptly is crucial. If left unchecked, persistent moisture can lead to mold growth, making it even harder to remove water stains from ceilings.
3. Improve Ventilation
Excess humidity is another common cause of ceiling stains. Poor airflow in bathrooms, kitchens, and attics can lead to condensation forming on ceilings. Ensure exhaust fans are functioning properly, and consider installing a dehumidifier to reduce moisture buildup. Ventilation improvements help prevent water damage and protect against mold growth. Additionally, proper airflow can prevent issues like water stains on popcorn ceilings, which are especially tricky to clean.
4. Clear Gutters & Downspouts
Your home’s drainage system plays a key role in preventing water damage. When gutters become clogged, rainwater has nowhere to go and can seep into your ceiling and walls. Regularly cleaning your gutters and ensuring proper downspout drainage can significantly reduce the chances of ceiling water stains reappearing. Investing in gutter guards can also minimize maintenance and keep drainage systems functioning properly.
Once the root cause is resolved, you can move forward with removing the stain and restoring your ceiling.
How to Remove Ceiling Water Stains?
Water stains range from light discoloration to deep, persistent marks. Here’s how to remove ceiling water stains effectively:
1. Vinegar Solution for Light Stains
White vinegar is a great natural cleaner. Mix equal parts vinegar and warm water in a spray bottle, apply it to the stain, and let it sit for 15 minutes before wiping with a sponge. This method works well for recent stains caused by condensation or minor moisture issues.
2. Bleach for Mold & Mildew
If mildew or mold is present, mix one part bleach with three parts water and apply it to the stain. Let it sit for 10 minutes, then wipe clean with a damp cloth. Always ensure proper ventilation when using bleach, as strong fumes can be harmful. Bleach effectively kills mold spores, preventing further growth.
3. Hydrogen Peroxide for Stubborn Stains
For deep-set stains, use 3% hydrogen peroxide in a spray bottle. Spray it directly on the stain, let it sit for 30 minutes, then blot with a damp cloth. Hydrogen peroxide lifts discoloration without damaging drywall and is an excellent alternative to bleach for those who prefer a less harsh chemical.
4. Commercial Ceiling Stain Removers
Products like magic eraser water stains ceiling cleaners or ceiling stain removers can be effective for tricky stains. Follow manufacturer instructions for the best results. These products are designed to lift stains without excessive scrubbing, making them a great option for delicate ceiling materials.
Professional Ceiling Restoration & Interior Painting
Even after cleaning, some stains may still be visible. That’s why priming and interior painting are essential to fully restore your ceiling. At [xompany], our interior painters in Henderson NV take a meticulous approach to ensure a smooth, professional finish that blends seamlessly with the rest of your home.
1. Prep the Surface
Before painting, our team carefully fills any cracks or holes, sands rough areas, and cleans the ceiling to remove dust, grease, and any remaining residue. This step ensures a smooth base for painting.
2. Use a Stain-Blocking Primer
A high-quality stain-blocking primer is applied to prevent any water stains from bleeding through the new paint. We use oil-based or shellac primers, which are the most effective for sealing water damage and discoloration.
3. Choose the Right Paint
For ceilings exposed to humidity and moisture, such as in bathrooms and kitchens, we use moisture-resistant ceiling paint to help prevent future stains and mold growth. Our paint selection is designed to enhance durability and longevity.
4. Apply Paint Evenly for a Flawless Finish
Our professional painters use expert techniques to ensure an even, streak-free application that blends perfectly with the rest of your ceiling. We focus on precision and quality, ensuring long-lasting beauty and protection.
Final Thoughts
After you remove ceiling water stains, repainting is a smart choice. Once the stain is removed, it’s crucial to prime and repaint your ceiling to restore its original appearance. A stain-blocking primer will prevent stains from bleeding through, and using moisture-resistant ceiling paint ensures long-term protection. If you want a flawless finish, consider hiring professional interior painters in Henderson NV to handle the job.
For expert stain removal, drywall repair, and interior painting services, contact Norse Painting today! We proudly serve Las Vegas, NV, and the surrounding areas. Call 725-217-5377 for a FREE estimate!